
Did you know limestone is one of the most enduring natural materials but can still show signs of wear over time? Whether it’s cracks, chips, or dullness, many issues can be restored to preserve its timeless beauty.
Key Points:
- Professional limestone restoration often achieves the best results.
- Surface damage can include cracks, stains, or etching.
- Proper sealing extends the life of the stone.
- DIY solutions are possible for minor issues.
- Regular maintenance reduces the risk of future problems.
Professional Restoration and Polishing for Limestone Surfaces
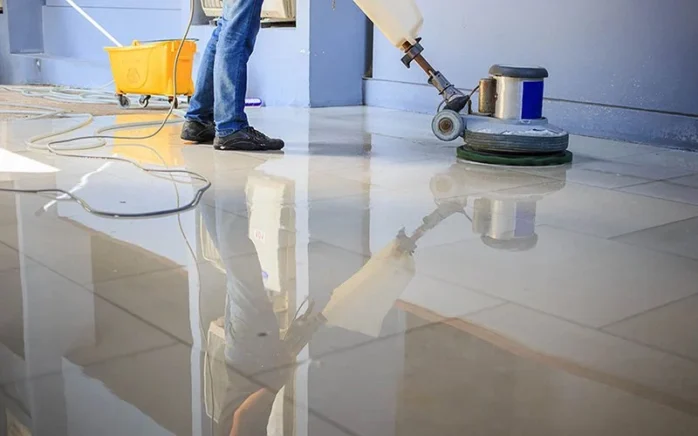
Restoring limestone starts with identifying the issue. Professional limestone restoration and polishing can address cracks, dullness, and discoloration. Experts assess the stone’s condition, polish it to revive its natural sheen, and apply a sealant to protect against future wear. Specialists, such as Renue Hawaii, use eco-friendly products that ensure your surfaces remain beautiful and durable, even in challenging climates.
Common Types of Limestone Surface Issues
Not every problem requires professional attention, but understanding common issues helps. Below are the most frequent challenges:
- Cracks: Small cracks may result from heavy foot traffic or accidental impact.
- Stains: Due to its porous structure, limestone absorbs liquids quickly, making it prone to discoloration.
- Etching: Acidic substances, like wine or citrus, can leave dull marks on the surface.
- Chips: Impact damage often leads to small, noticeable chips.
- Dullness: Everyday use can wear away the natural shine.
Step-by-Step Guide to Limestone Surface Repair
1. Assess the Surface
Begin by carefully inspecting the affected area. Identify cracks, discoloration, or dull spots. Look for irregularities in texture or sheen.
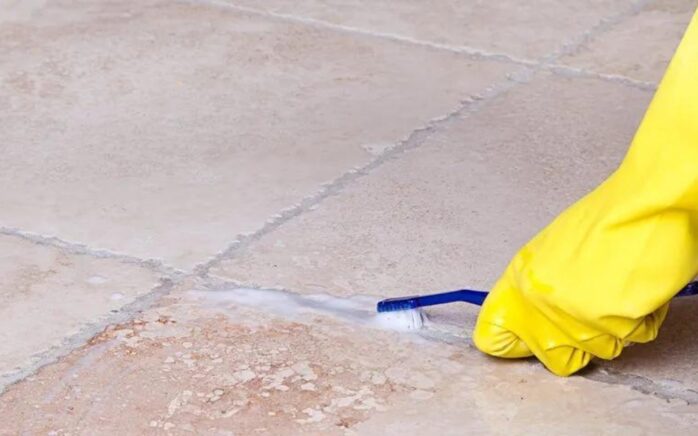
2. Clean Thoroughly
Remove dust and debris using a soft microfiber cloth. For deeper cleaning, use a pH-neutral stone cleaner and warm water. Avoid acidic cleaners that can harm limestone.
3. Address Stains
- Oil-based stains: Use a paste of baking soda and water. Let it sit for 24 hours, then rinse.
- Organic stains: Apply hydrogen peroxide sparingly to lighten discoloration.
4. Fill Small Cracks
- Mix stone epoxy with a color-matching compound to achieve a seamless blend.
- Apply the mixture using a small applicator, ensuring the surface is smooth.
5. Polish for Restoration
- Use a soft buffing pad and a specialized limestone polish to restore shine.
- Follow the manufacturer’s instructions for best results.
6. Apply a Sealant
Sealants protect limestone by preventing stains and damage. Choose a high-quality product designed for limestone surfaces. Apply evenly, covering all areas to ensure long-lasting protection.
Common Mistakes to Avoid
Mistakes during repair can worsen the damage. Here are errors to steer clear of:
- Using harsh chemicals: Acid-based cleaners erode limestone.
- Skipping the sealing step: Unsealed limestone remains vulnerable to future issues.
- Improper polishing techniques: Over-polishing can create uneven surfaces.
Long-Term Maintenance Tips for Limestone Surfaces
Maintaining limestone prevents damage and keeps it looking pristine. Consider the following tips:
- Regular Cleaning: Wipe surfaces weekly with a damp cloth and a neutral cleaner.
- Avoid Acidic Spills: Clean spills immediately, especially from acidic liquids.
- Re-seal Periodically: Reapply sealant every 1-2 years to maintain protection.
- Use Floor Mats: Place mats near entrances to reduce dirt and debris.
Final Advice
Restoring limestone surfaces doesn’t have to feel overwhelming. With proper care and occasional professional help, your limestone can remain a stunning feature for years to come. If you’re unsure where to start, professional services offer tailored solutions for polishing, sealing, and addressing surface imperfections. By combining routine maintenance with expert care, you can protect the natural elegance of your limestone.
Make sure to act early when noticing damage, and always prioritize high-quality products to maintain your investment.
")


")
")
")


")


")
")
")
